Storefront
Self-service ordering portal where customers browse products, build a basket, and pay via Stripe — a premium add-on for MSPs who want to enable customer-initiated orders.
Written By Victor Raessen
Last updated 20 days ago
The Storefront is a premium add-on that turns Salesbuildr into a self-service ordering portal. Instead of receiving a quote, your customers browse your product catalog, build their own basket, and check out — with or without Stripe payment.
Add-on required. Storefront is not included in the standard Salesbuildr plan. Contact your account manager to enable it for your tenant.
How it works for customers
When Storefront is enabled, your signed-in contacts can:
Browse your product catalog by category or search
Add products (with add-ons and quantities) to a basket
Review their basket — adjust quantities, remove items, manage optional add-ons
Check out — confirm PO number, accept terms and conditions, sign, and place the order
Pay via Stripe if your configuration requires payment before the order is processed
Each basket is a special quote type in Salesbuildr. Baskets appear in your quotes list alongside standard quotes — they can be tracked, audited, and synced to your PSA in the same way.
Browse categories
Customers navigate to your branded storefront and browse products organized by category. Each category can display as a list or tiles (cards), configured at Settings > Site Settings > Storefront.
Categories can include a description, header image, and content blocks configured in your catalog.
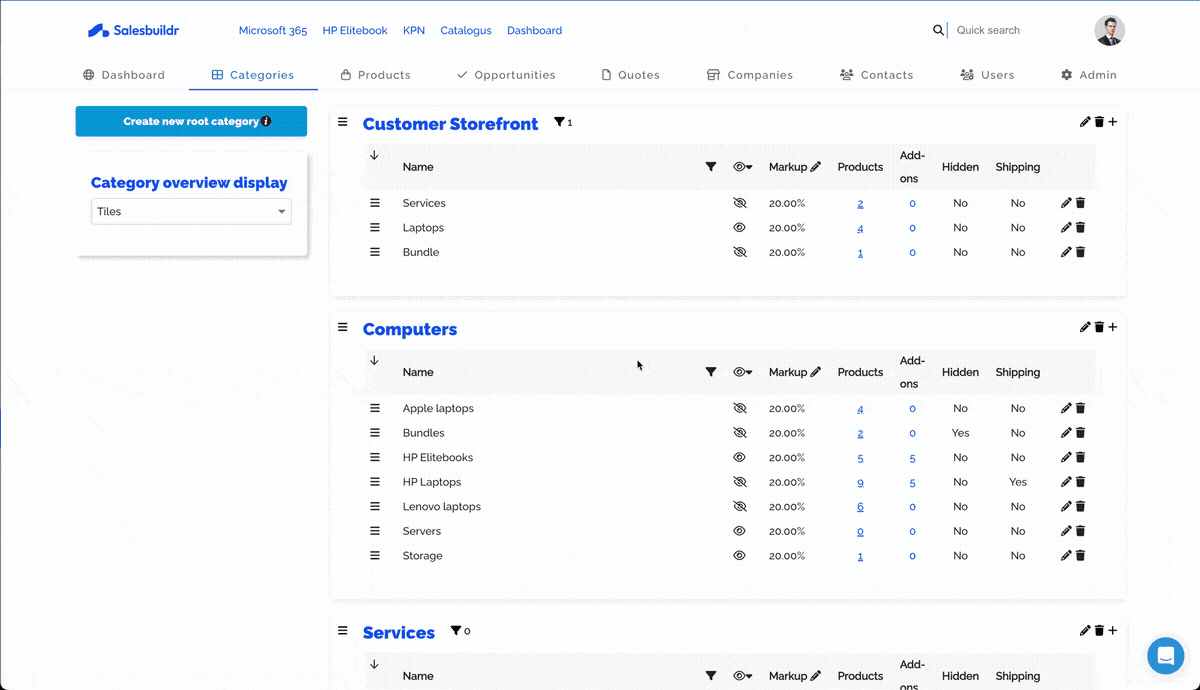
Storefront category structure with subcategories and display options Feb 20, 2026
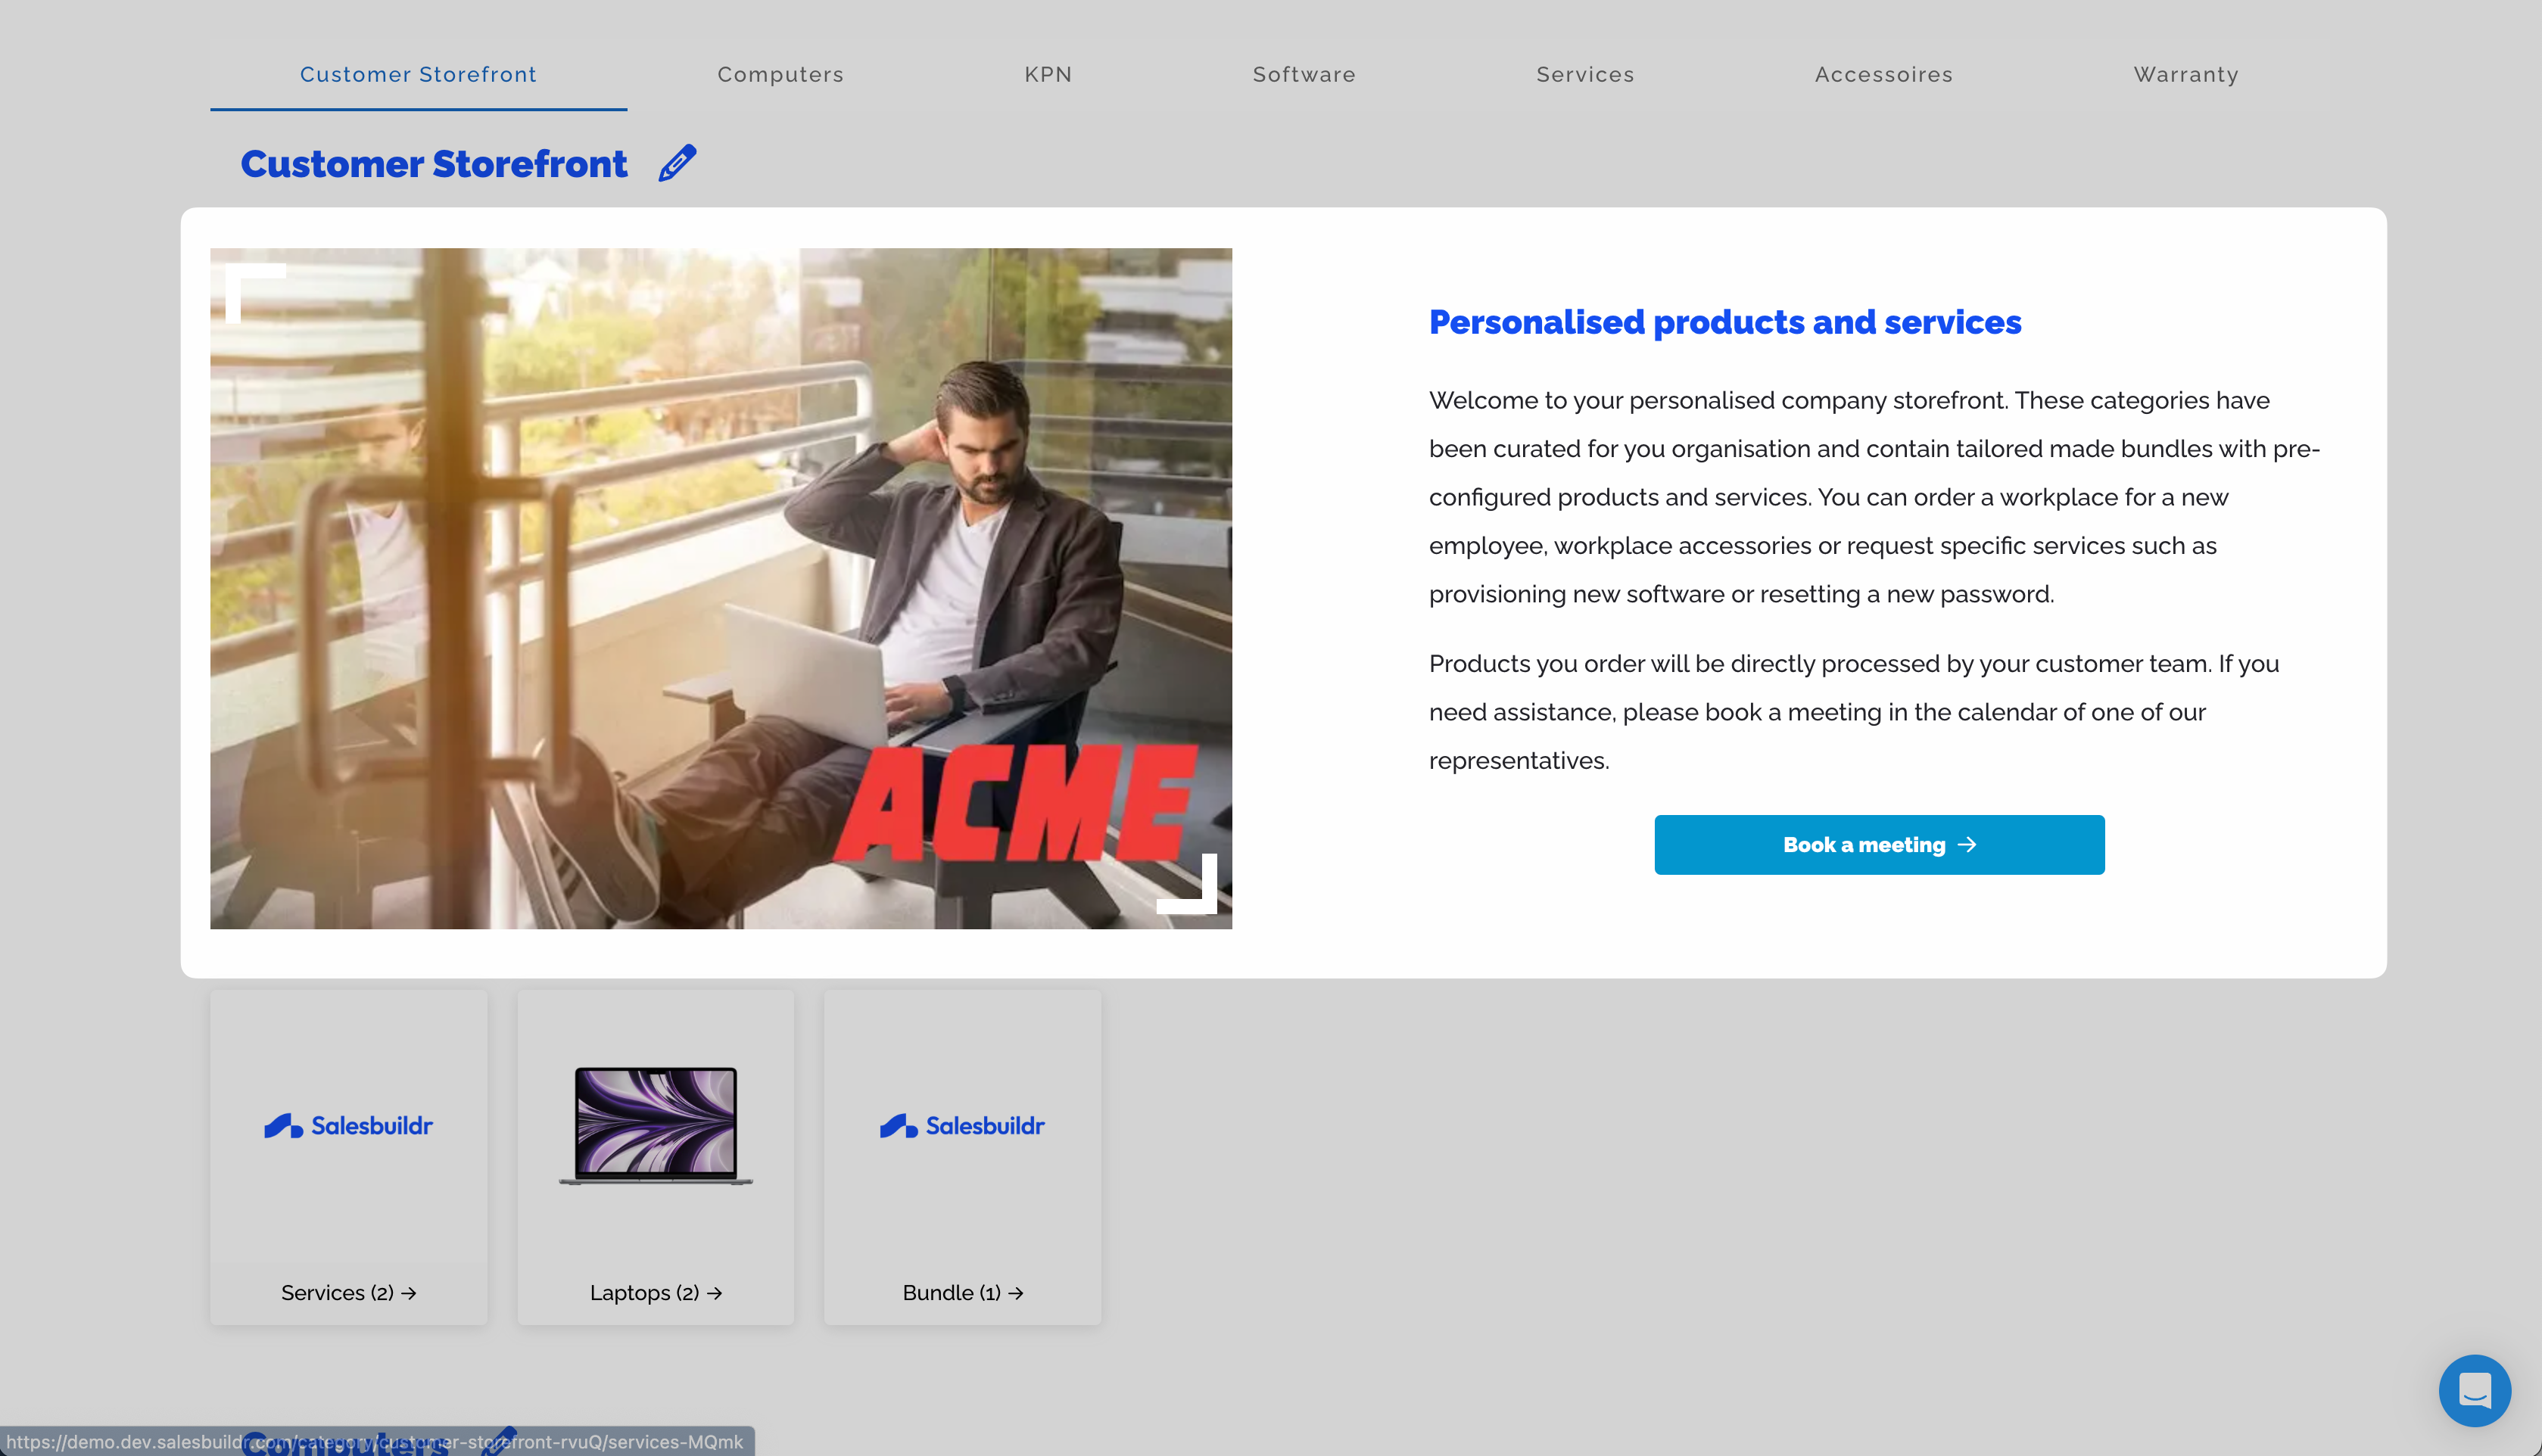
Customer-facing storefront with personalized products and category tiles Feb 20, 2026
Add to basket
On a product page, customers click Add to Cart to add a product to their basket. They can:
Set quantity
Select optional add-ons (required add-ons are pre-checked)
If multiple baskets are open, choose which basket to add the item to
After adding, a confirmation toast appears with a link to the basket.
Customers must be signed in to add items to a basket. If a company has self-service disabled, the Add to Cart button will show an error — see Company-level self-service control.
Cart review (Step 1)
The cart review page shows all items in the basket:
Product name, price, and billing term (e.g. /month)
Quantity input — changes are saved automatically
Optional add-ons with checkboxes — required add-ons are fixed
Bundle items expandable for detail
Delete button to remove individual items
From here, customers click Checkout to proceed to step 2.
Checkout (Step 2)
The checkout page collects the information needed to place the order:
Before the order can be placed, the customer must also:
Accept the terms and conditions (a dialog or implicit acceptance, depending on your configuration)
Approve any documents marked as requiring customer approval
Once all requirements are met, the available action button appears: Place Order, Submit for Approval, or Pay Now (if Stripe is configured).
After the order
The basket is removed from the customer's open baskets
Line items and pricing sync to your PSA
If a Thank You page is configured, the customer is redirected there after checkout
If Stripe payment is required, the customer is redirected to Stripe Checkout before the order is finalized
The quote status moves to Approved (direct orders) or Sent (internal) (approval workflows), or Pending payment while waiting for Stripe confirmation. See Quote statuses for the full lifecycle.
Setting up Storefront
Step 1 — Enable Storefront for your tenant
Contact Salesbuildr support to enable the Storefront feature flag on your tenant. Once enabled, the /category and product browsing routes become accessible to signed-in customers.
Step 2 — Configure Stripe (if using payments)
Navigate to Settings > Integrations > Stripe.
On the Webhooks tab, click Create webhook
Salesbuildr creates the webhook endpoint and saves the webhook secret automatically
Your Stripe API key is configured at the tenant level by Salesbuildr — contact support if you need to update it
Once configured, baskets that require payment will redirect customers to Stripe Checkout. After successful payment, the webhook triggers order processing automatically.
For standard baskets without payment, customers place orders directly — no Stripe configuration needed.
Step 3 — Storefront display settings
Navigate to Settings > Site Settings > Storefront to configure:

Category settings with stock visibility and company whitelist Feb 20, 2026
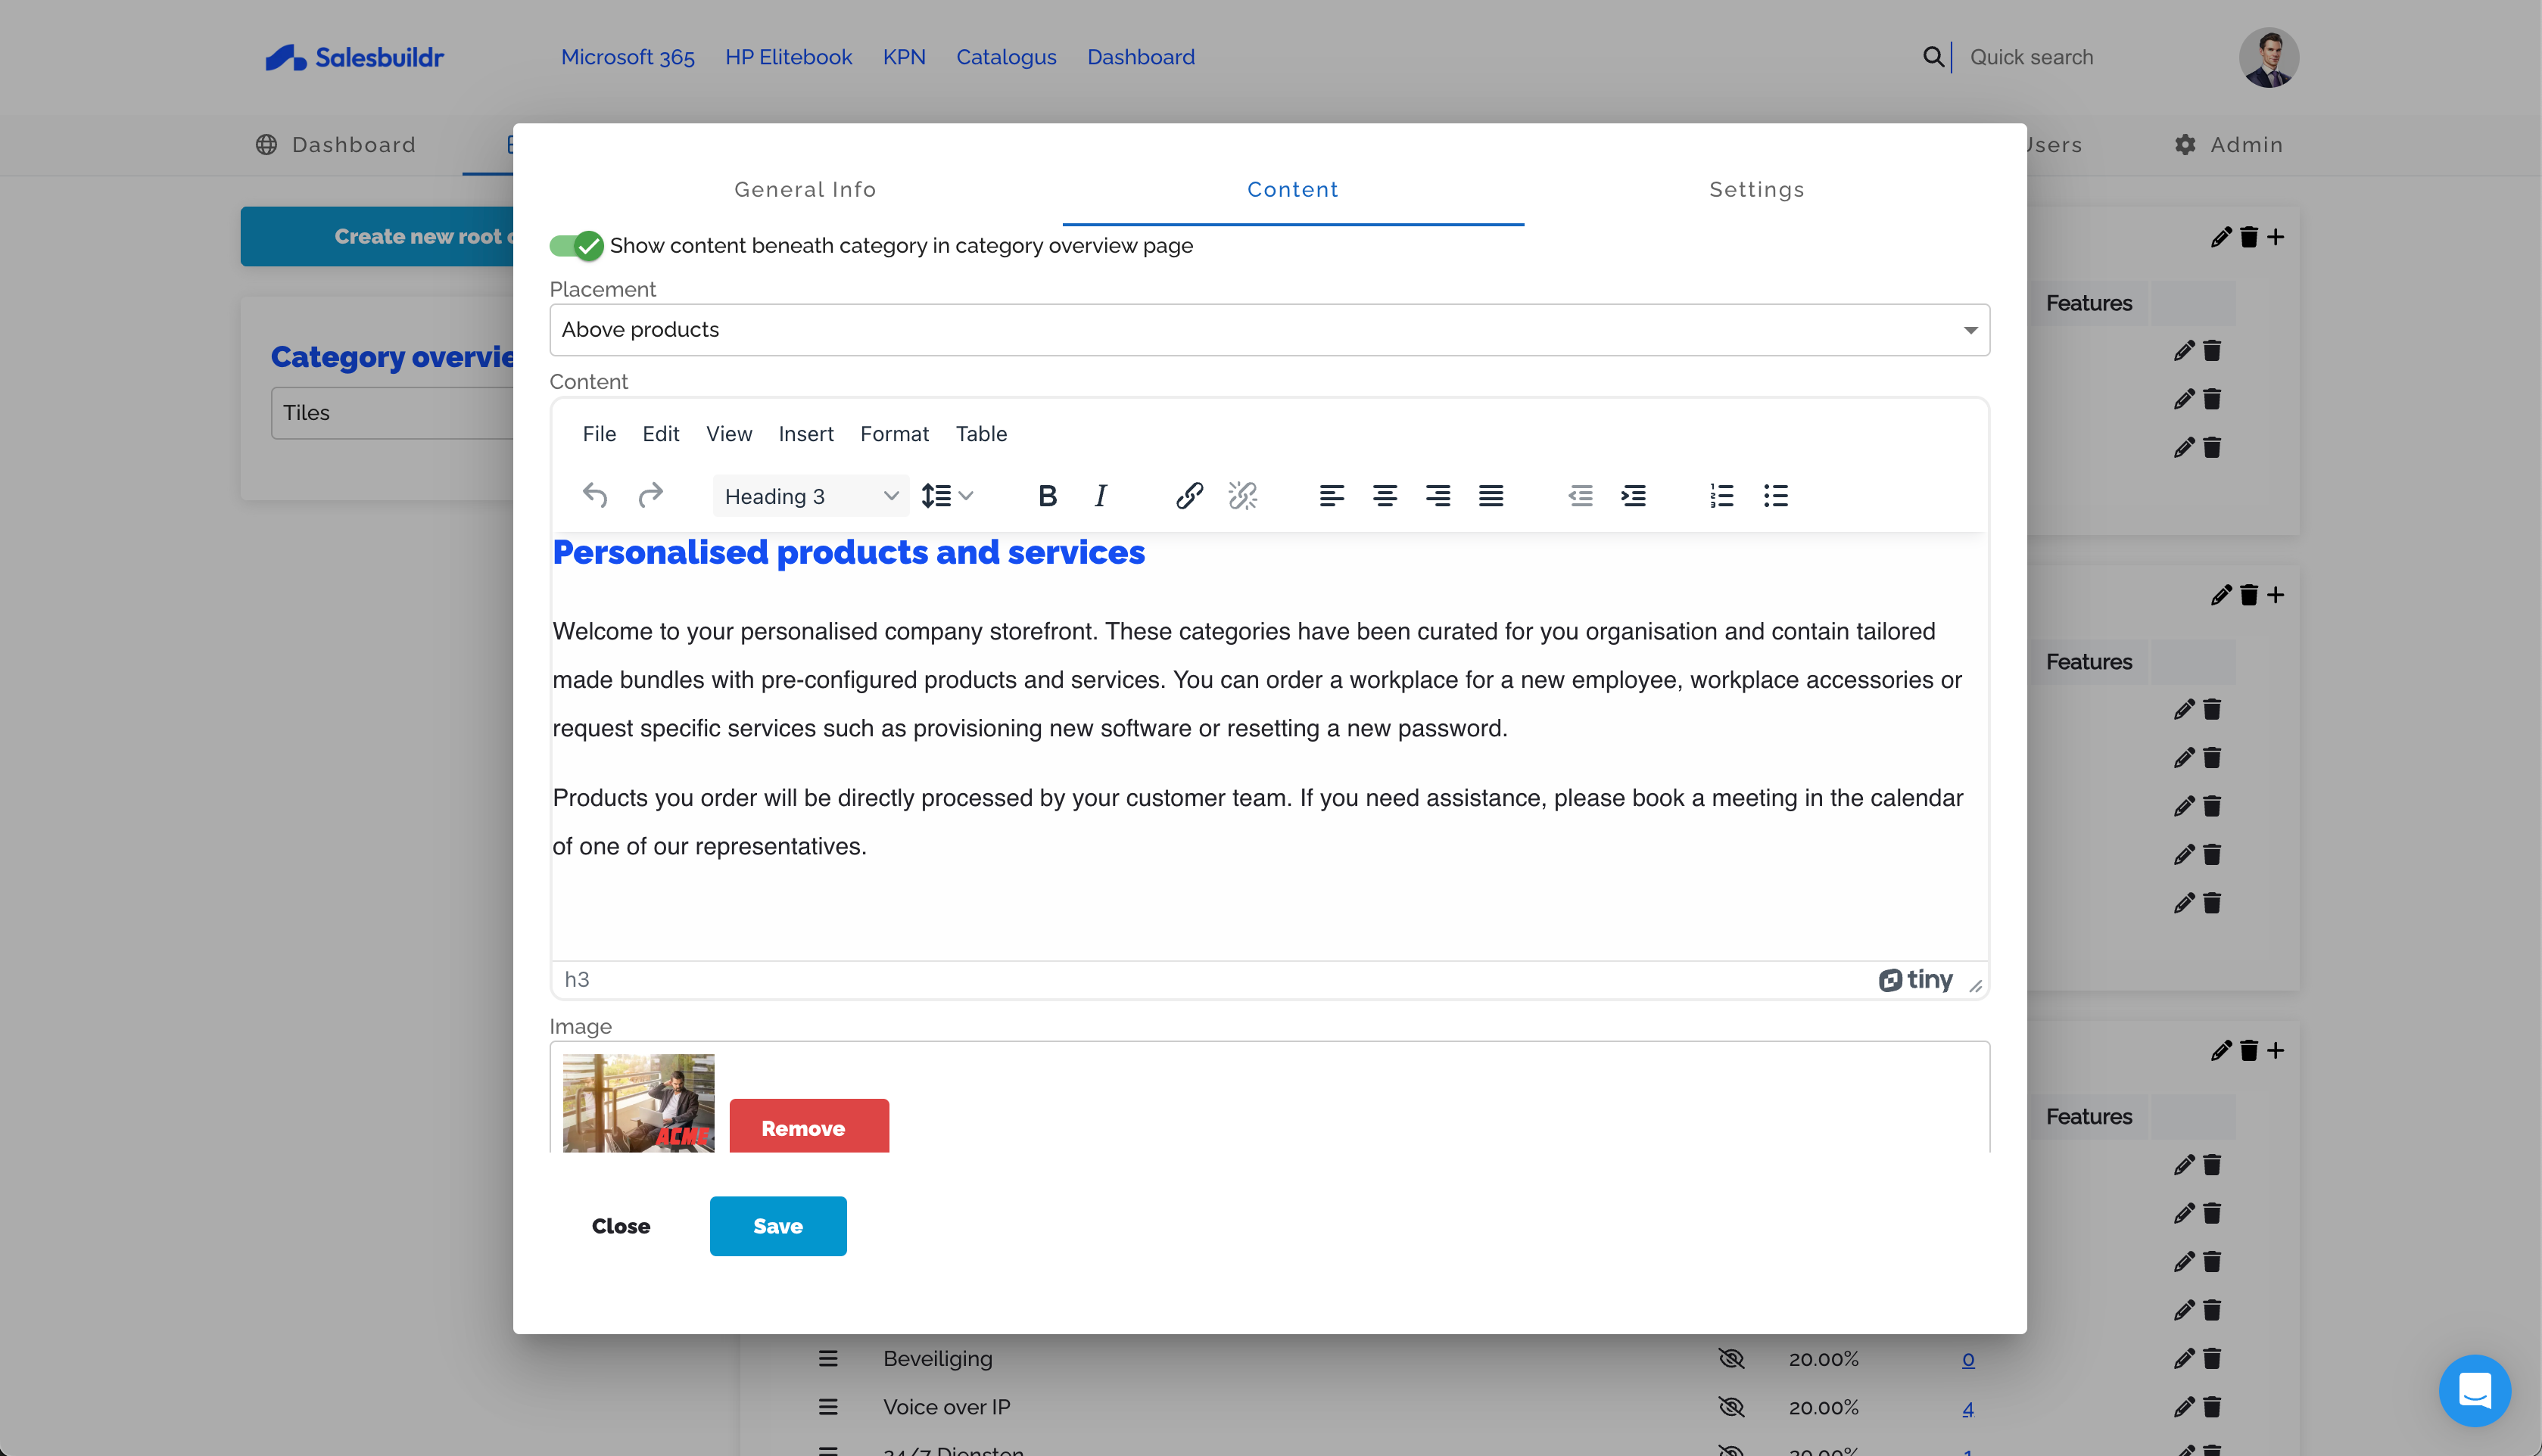
Category content tab with hero image and welcome text Feb 20, 2026
Step 4 — Configure terms and conditions
Terms and conditions are shown during checkout. Configure them at Settings > Site Settings > Portal Branding.
You can set:
Implicit T&C — displayed as informational text, no checkbox required
Explicit T&C — customers must open and accept a dialog before checkout
Company-level self-service control
Storefront access is controlled at two levels: the tenant feature flag (Step 1 above) and a per-company setting.
Each company record has an Allow self-service orders toggle. When this is off, contacts at that company cannot add items to a basket — they see an error message instead.
Manage this setting on the company record in Companies.
This lets you enable Storefront broadly while still restricting it to specific customers — useful when rolling out self-service ordering gradually.
Storefront Login Defaults and Access Control
By default, storefront login access works as follows:
Companies: Storefront login is disabled by default. You must manually enable each company before any of its contacts can log in.
Contacts: Once a company is enabled, all contacts for that company default to login enabled, including new contacts that sync in from your PSA.
Important: New PSA contacts inherit login-enabled status
If you have enabled storefront login for a company but want to restrict access to specific approved contacts only, be aware that any new contact synced from your PSA will automatically be set to login enabled. This means a new starter at a client could potentially access the storefront before you have reviewed their account.
Recommended practice until a configurable default is available
Until a feature to set new contacts to login-disabled is available:
Regularly audit the Contacts list for enabled companies after PSA syncs
Manually disable storefront login for any contacts who should not have access
Consider only enabling storefront login for companies where all contacts are pre-approved
Payments: the Stripe flow in detail
When a basket action is prepare-payment:
Salesbuildr creates a Stripe Checkout Session on the backend
The customer is redirected to
payment.url— the Stripe-hosted checkout pageThe customer completes payment on Stripe
Stripe sends a
checkout.session.completedwebhook to SalesbuildrSalesbuildr processes the webhook, marks the quote as paid, and places the order
The quote status shows as Pending payment while awaiting the webhook. After confirmation, it moves to Approved.
If a customer leaves before completing payment, they can return to the basket and retry — a Complete Payment button appears in the checkout sidebar with a link to the Stripe session.
Product visibility
Control which products each customer sees using category whitelisting. Assign specific product categories to a company, and only those categories appear in their storefront.
This is configured per company on the company record, or via bulk edit across multiple companies.
Customer portal dashboard
When customers log in, they see a personalized dashboard with configurable tiles. You can customize the dashboard tiles at Settings > Site Settings > Storefront.
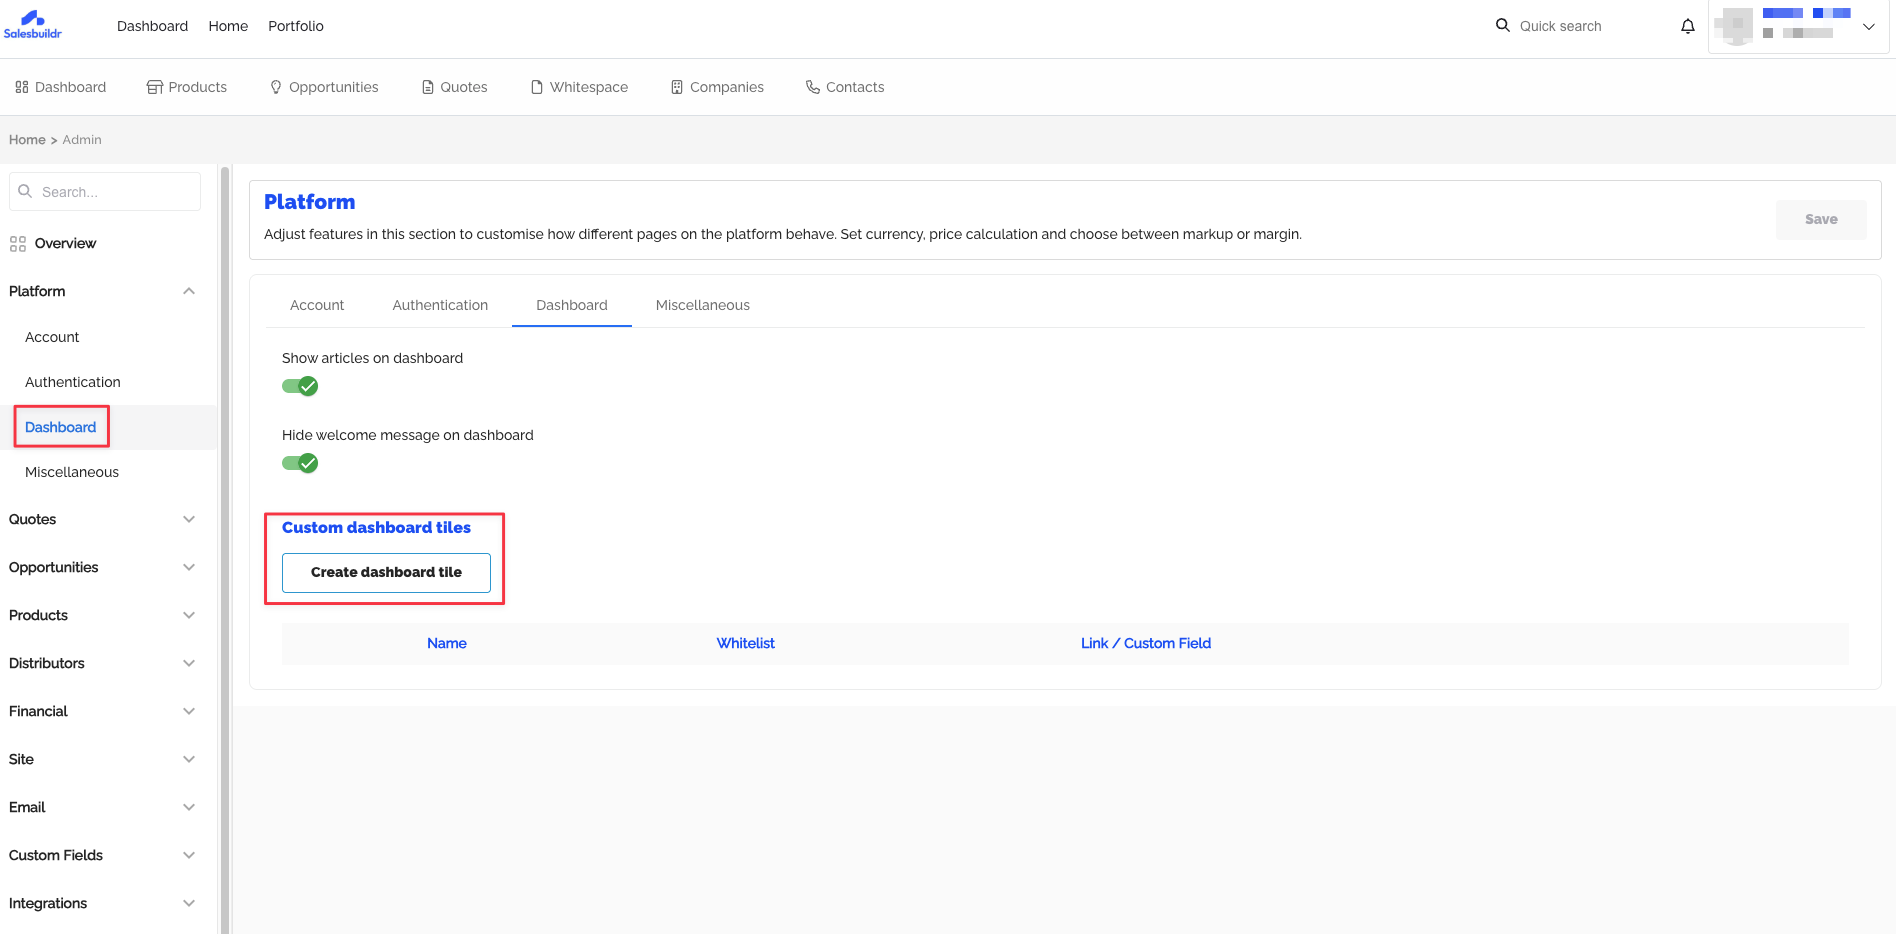
Custom dashboard tiles configuration for the customer portal Feb 20, 2026
Order confirmation emails
When a customer places a self-service order, they receive a confirmation email. These templates are localized and can be customized at Settings > Emails.
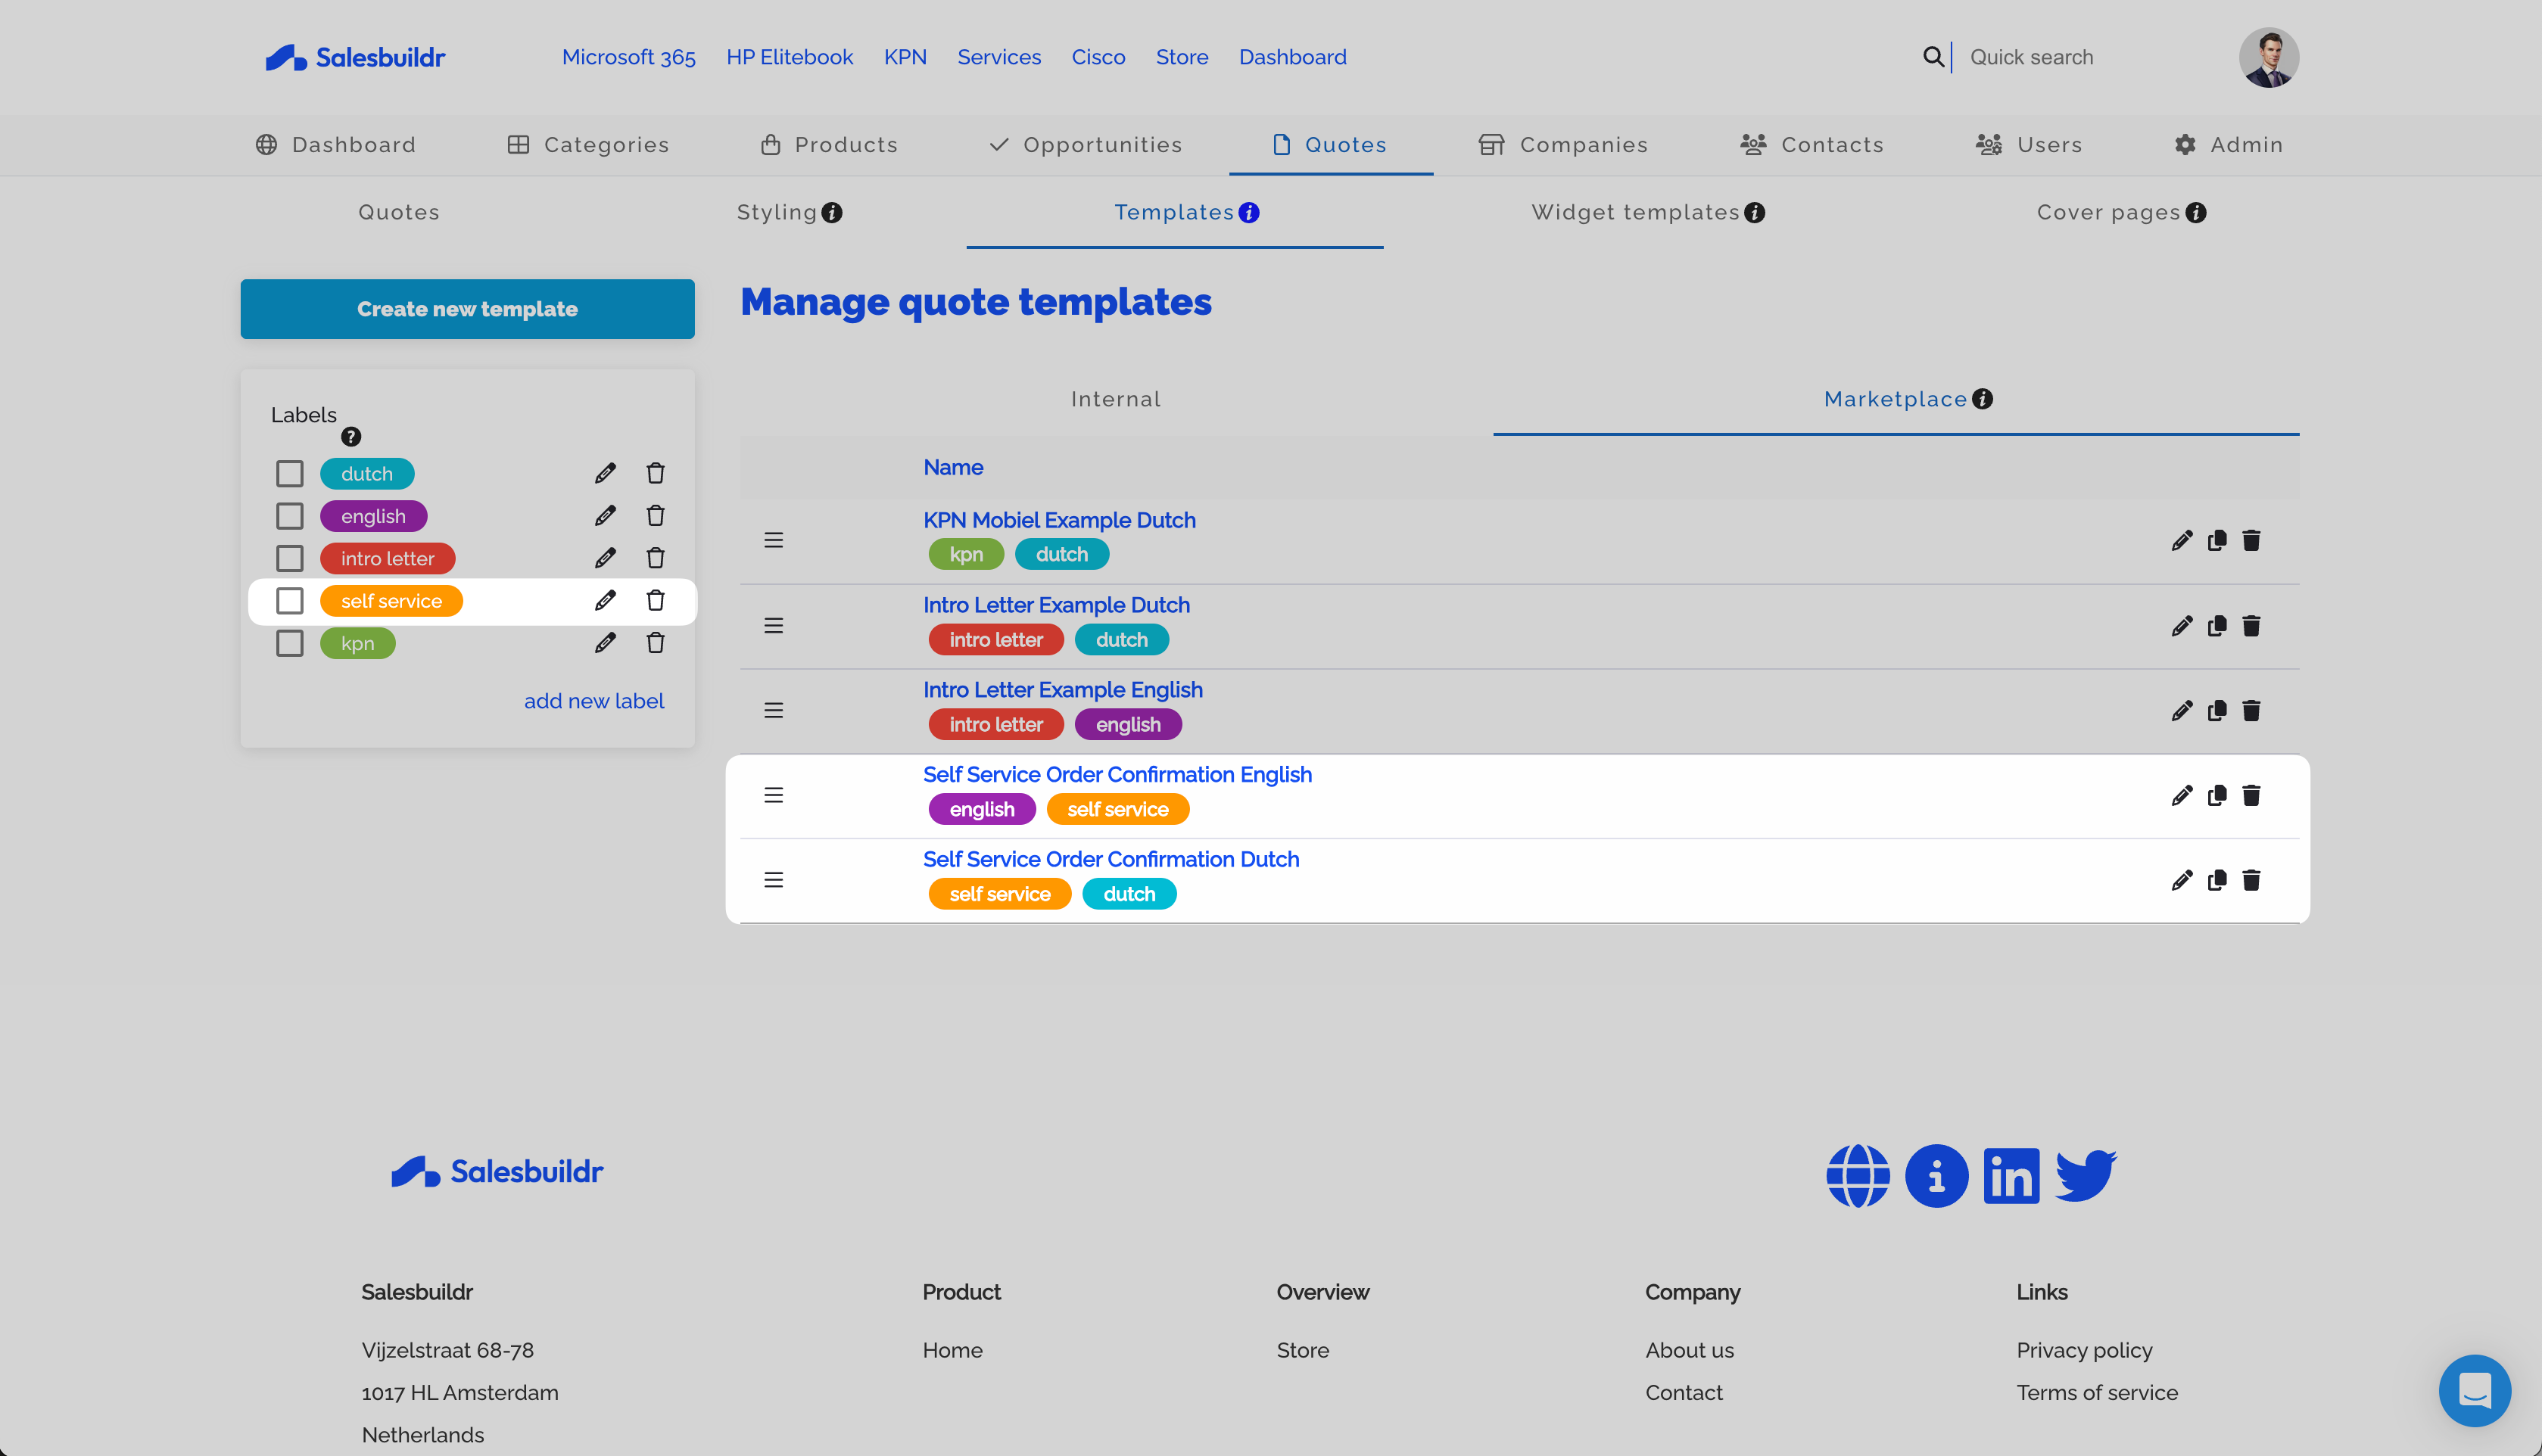
Self-service order confirmation templates (English and Dutch) Feb 20, 2026
Self-registration
Customers can register for your storefront through a public registration form. The registration goes through an admin approval process:
The customer visits your storefront landing page and clicks Register
They choose a sign-in method (Google, Microsoft, or email) and fill in their company details
An admin receives a notification email about the new registration
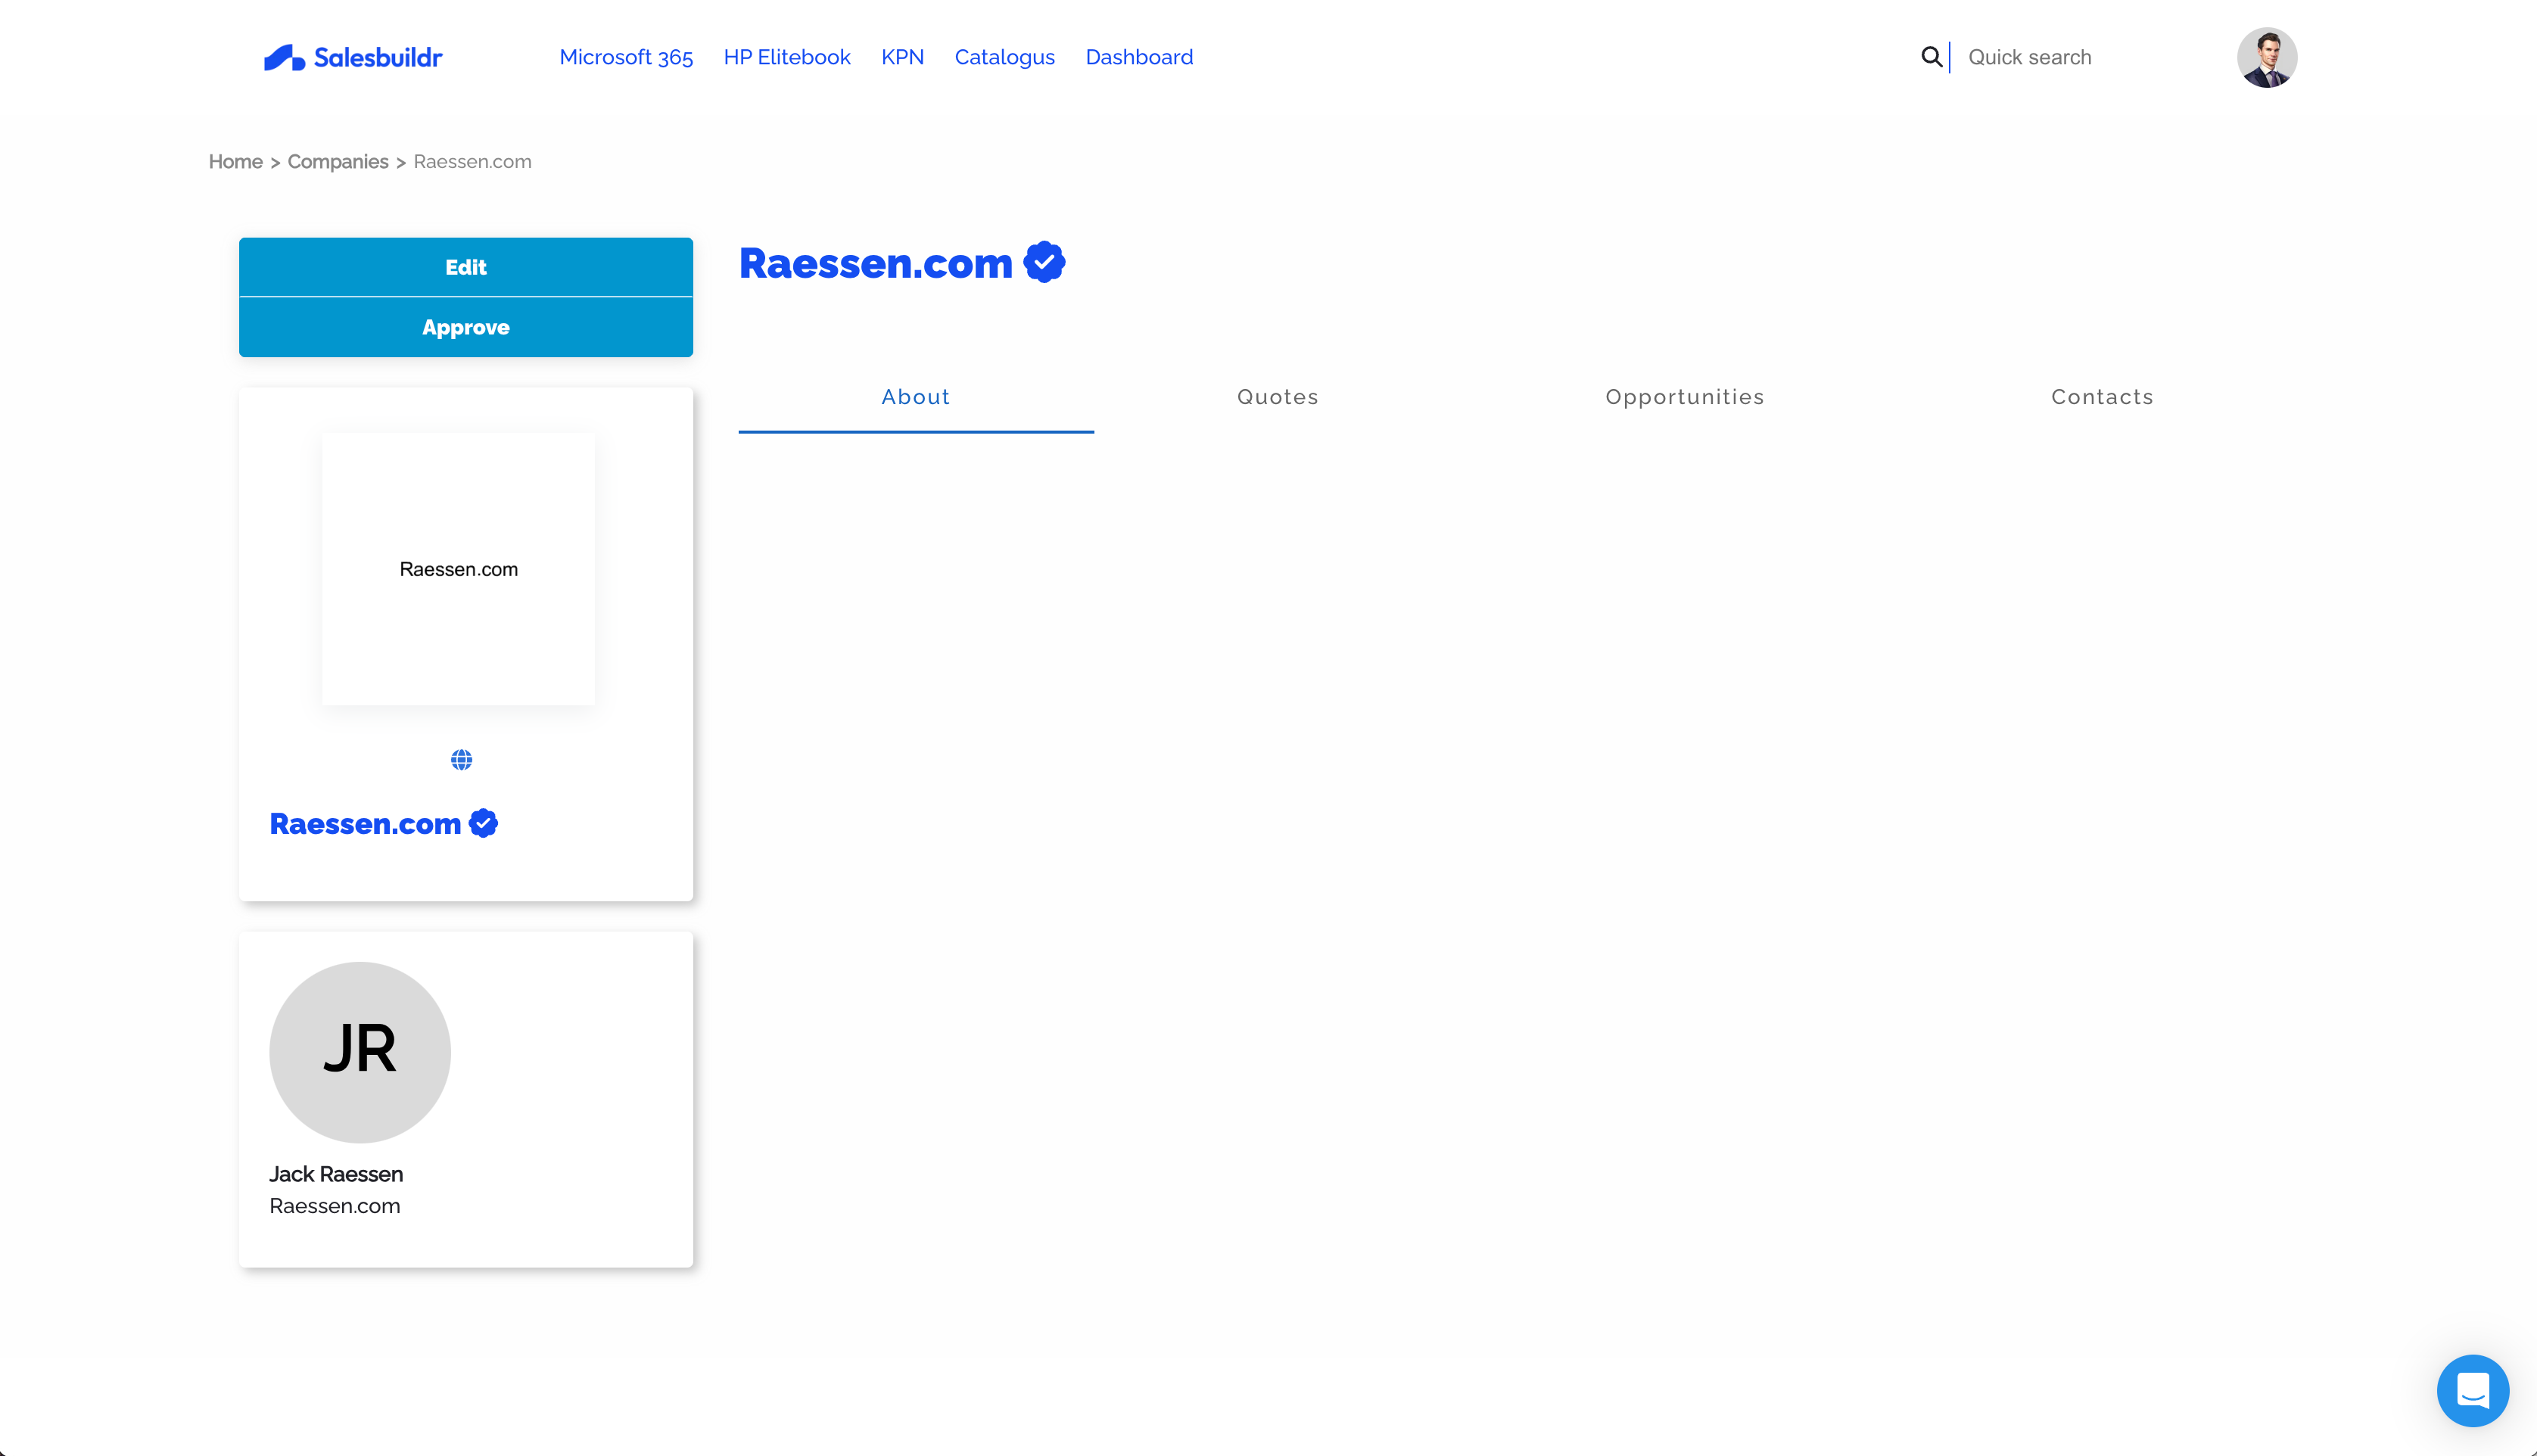
The admin reviews the registration on the company detail page and clicks Approve
The customer receives a confirmation email and can start ordering
Public storefront landing page with login and registration options Feb 20, 2026
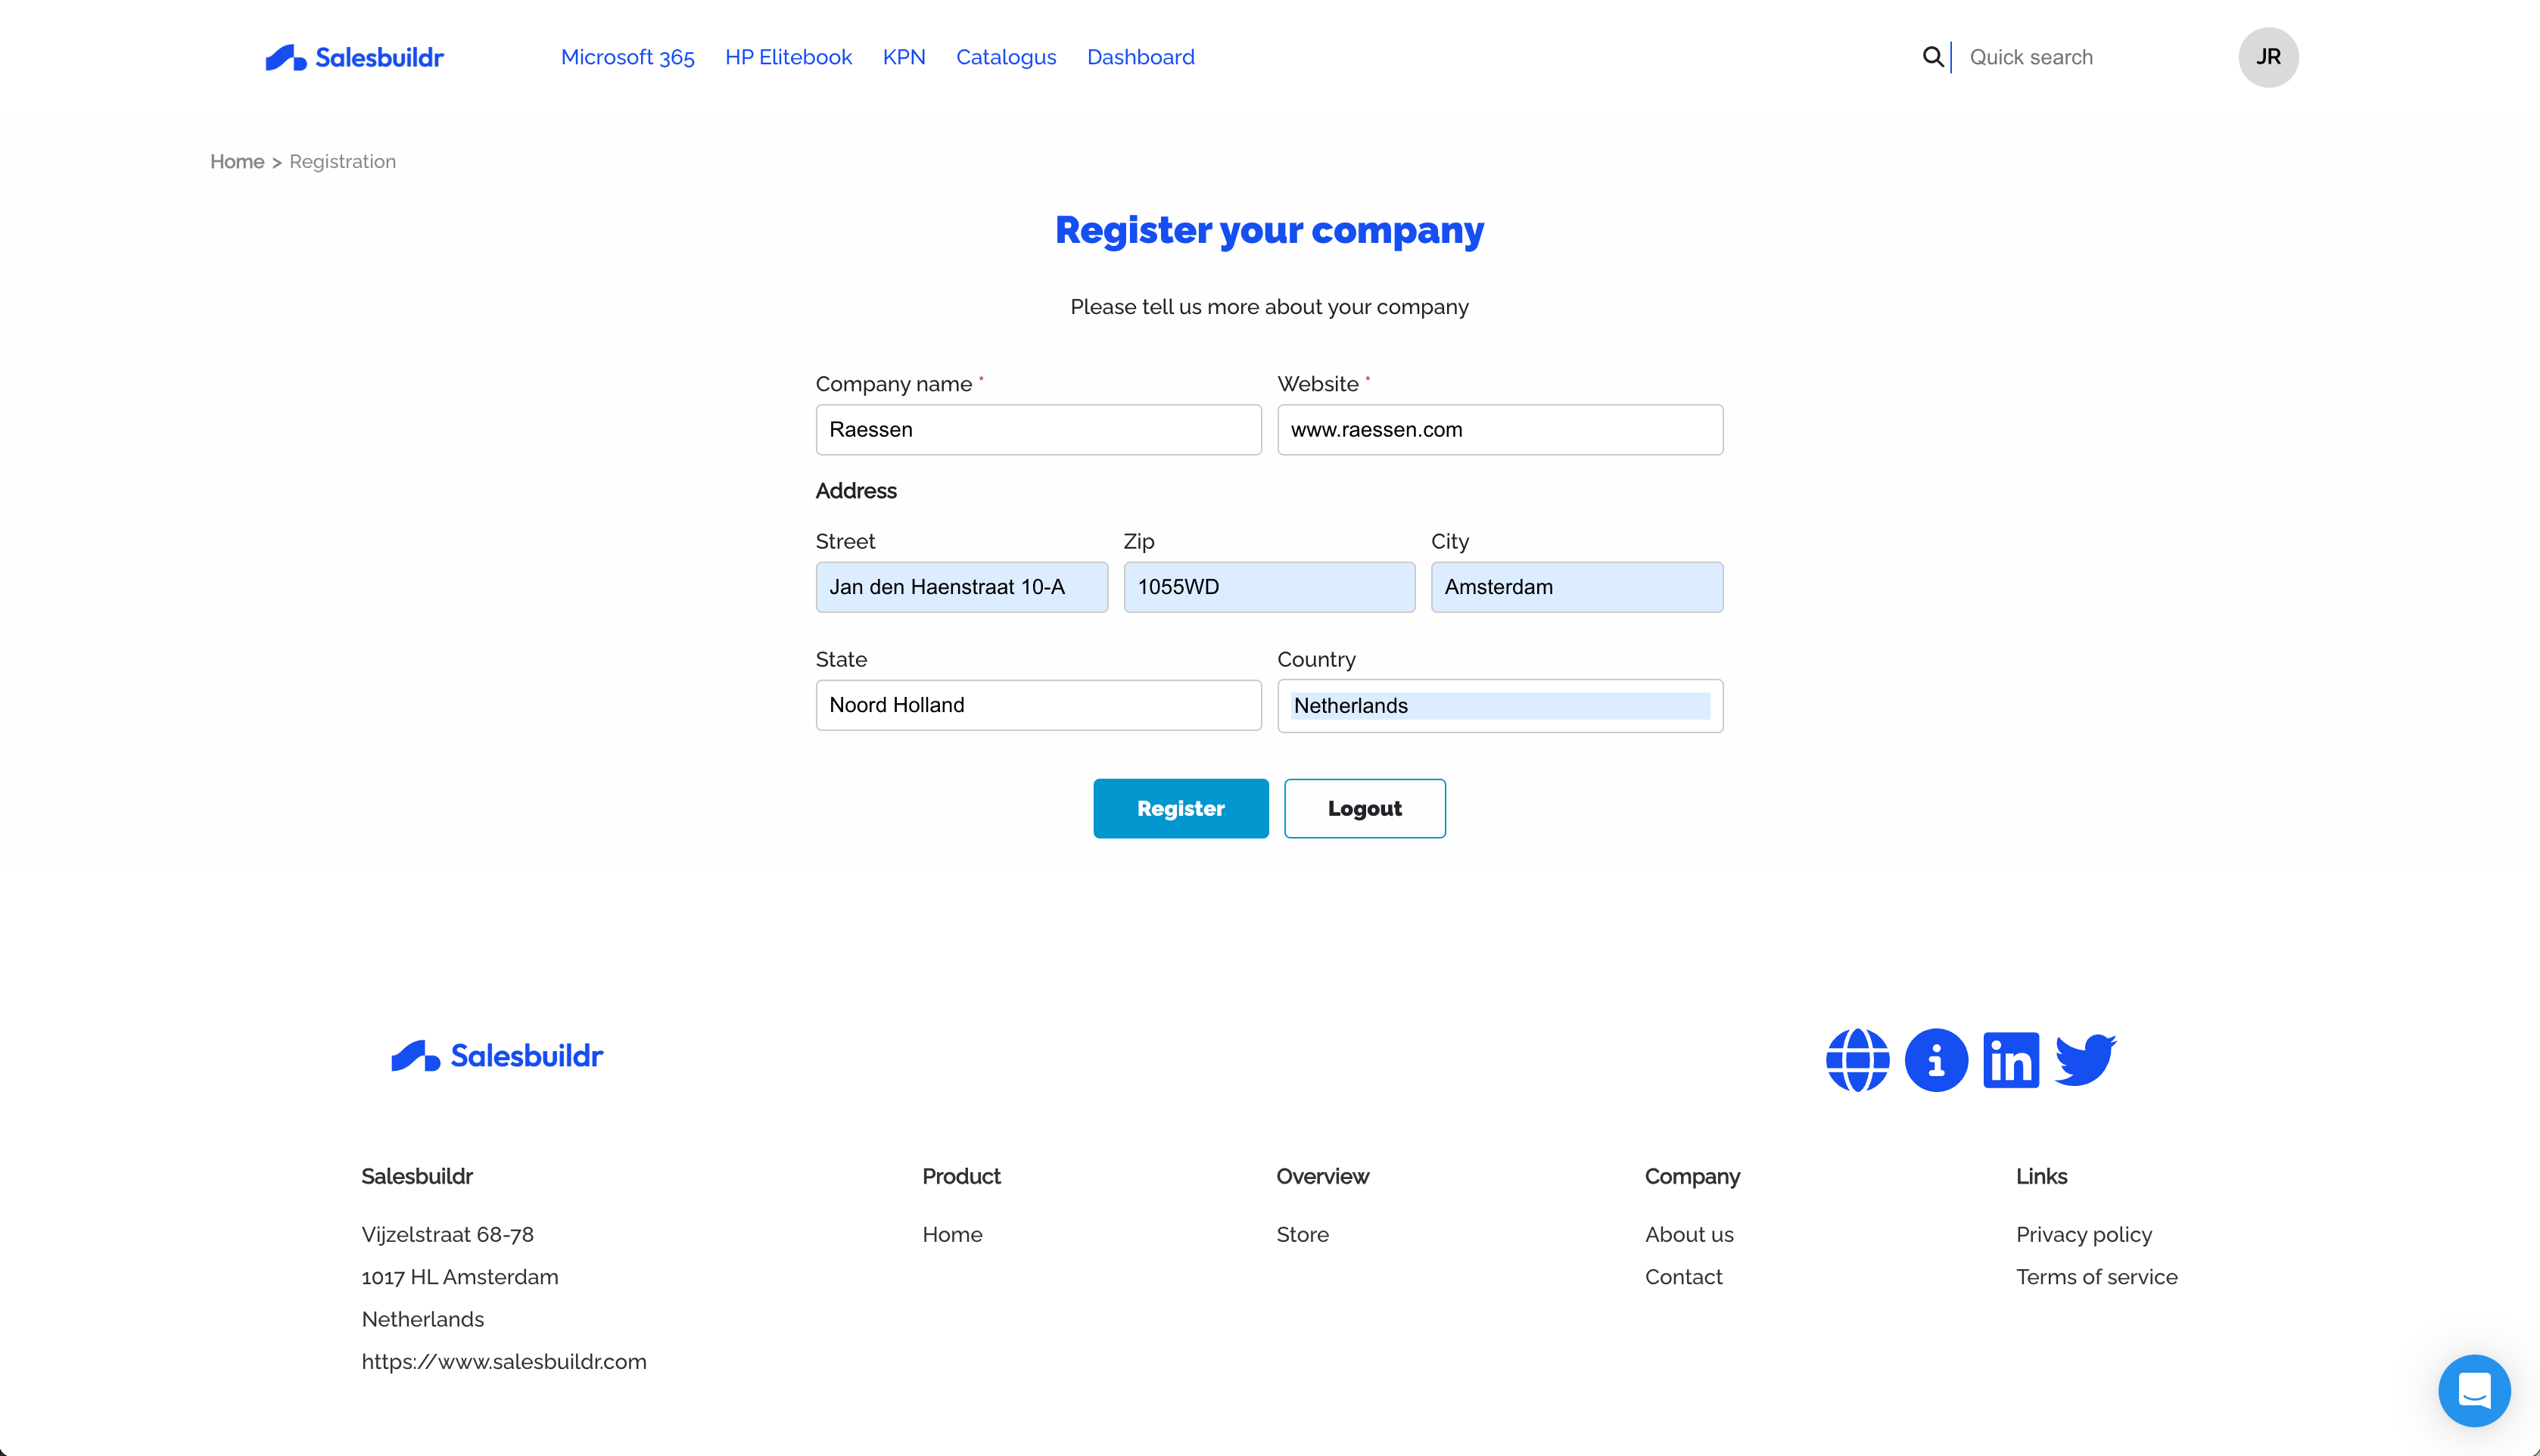
Company registration form with name, website, and address fields Feb 20, 2026
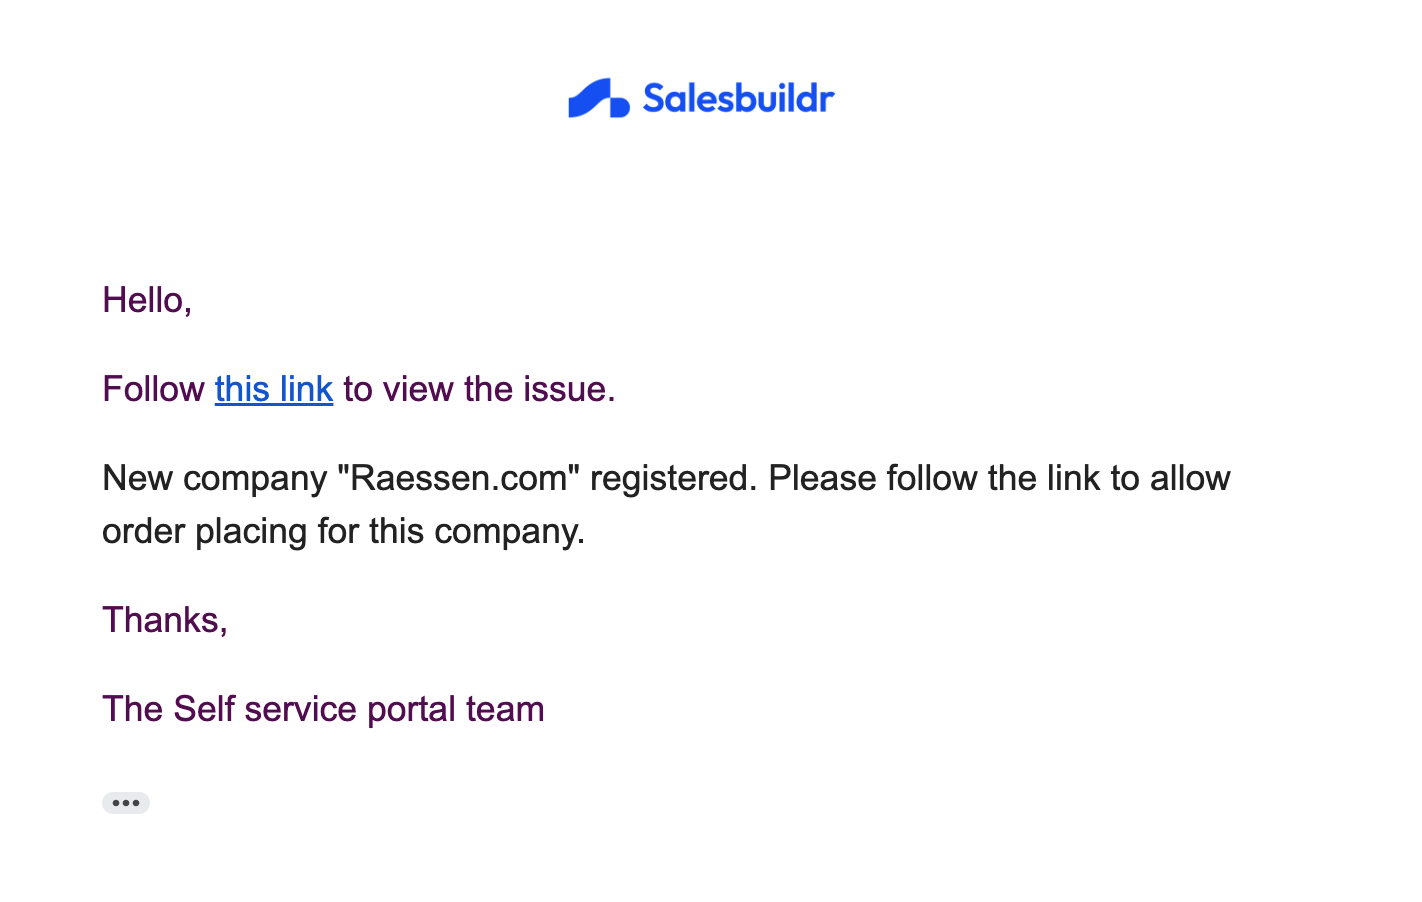
Admin notification email when a new company registers Feb 20, 2026
Internal company detail page with Approve button for new registration Feb 20, 2026
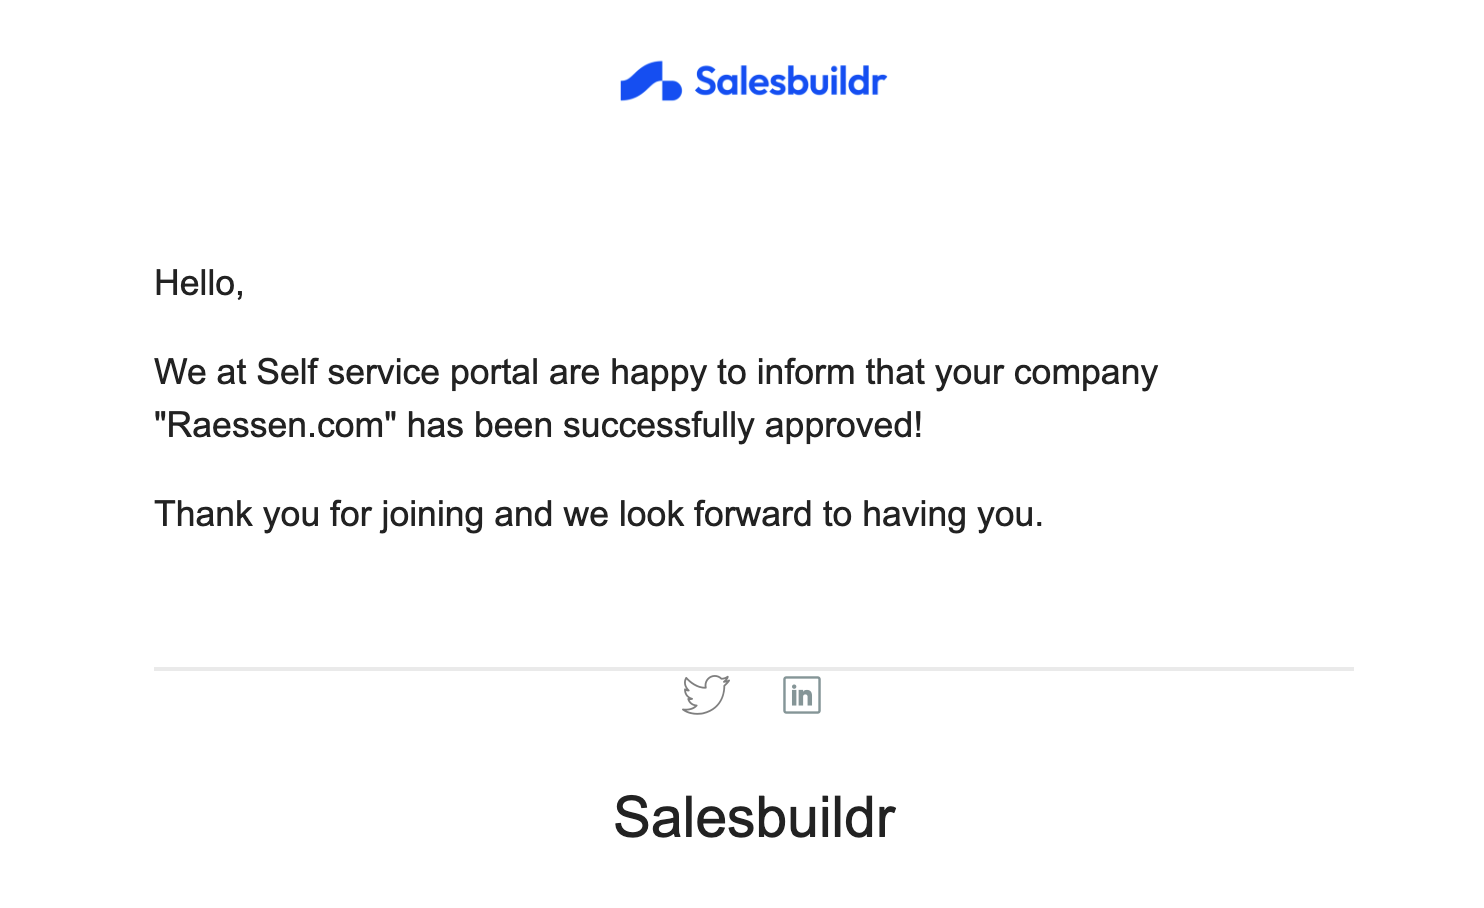
Customer approval confirmation email after admin approves registration Feb 20, 2026
Note: Unverified self-registered contacts are automatically set to unlisted until approved by an admin. See Contacts for more on listed and unlisted contacts.
Subscription tiers
Storefront is available in three subscription tiers, each unlocking progressively more capability:
Tier availability is managed through your Salesbuildr subscription. Contact your account manager to change your plan.
Category whitelisting
Control which product categories each customer company can see in the storefront. This is useful when you sell different product lines to different customer segments.
How it works:
Navigate to Settings > Categories, select a category, and open the Settings tab
Add specific companies to the Company Whitelist, or add company classifications to the Classification Whitelist to cover groups of companies at once
When a category has no whitelist configured, it is visible to all companies
Inheritance rules:
If a parent category is whitelisted and the child category has no whitelist, the child inherits the parent's visibility
If a child category has its own whitelist, it overrides the parent — the company must be in the child's whitelist
Root categories are visible as long as at least one of their children is visible to the company
Additional category settings that affect visibility:
Note: Users with quote management or product management permissions always see all categories, regardless of whitelist settings.
Multiple baskets
Customers can maintain multiple open baskets simultaneously — useful when preparing orders for different projects or departments.
How it works:
Each basket is a separate draft quote linked to an auto-created opportunity titled "Self service: Basket {date}"
When a customer with one basket adds a product, it goes straight into that basket
When a customer with multiple baskets adds a product, a selection dialog appears asking which basket to add it to
The basket page shows the current basket and lists other open baskets below it for easy switching
The basket icon in the header shows a badge count of all items (including selected add-ons) in the customer's current basket.
News and announcements
Publish company-facing news articles that appear in the storefront. Use announcements to highlight new products, promotions, policy changes, or other updates.
Where news appears:
Category pages — Up to 3 featured articles are shown at the top of each category page, filtered by that category
News page — A dedicated "News" link appears in the navigation when articles exist
Landing pages — Add a news block to any landing page to show the latest articles with a configurable limit
Article features:
Title, intro text, and full content with images or video
Associate articles with specific companies, products, or categories for targeted display
Schedule publishing with a start date and optional expiry date
Storefront and your PSA
Storefront orders flow through the same PSA sync pipeline as standard approved quotes:
Line items and pricing sync to your connected PSA
Tickets or agreements are created based on your PSA configuration
The audit trail records the order with timestamp and customer details
See Tickets & Orders for post-order PSA behavior.
See also
Onboarding Call 2 — Getting Started
Products — Settings
Dashboard — Dashboard
Email — Settings
Integrations — Integrations